 Hardwax oil represents a hybrid wood floor finish that combines the protective qualities of traditional hard waxes with the aesthetic appeal of oil. This unique formulation creates a durable, water-resistant surface whilst maintaining the natural beauty of your wood. Unlike polyurethane coatings that form a plastic-like layer, hardwax oil penetrates the wood grain, enhancing colour and character whilst providing robust protection against scratches, spills and daily wear.
The product has become increasingly popular across the UK, particularly amongst homeowners seeking a more natural, easily maintained alternative to conventional floor varnishes. Its popularity stems from superior durability, easier application for DIY enthusiasts, and the ability to touch up worn areas without visible joins.
Preparation: The Foundation for Success
Assessing Your Current Floor
Before applying hardwax oil, thoroughly evaluate your existing floor condition. For new wooden floors, simply ensure they're clean and dust-free. If your floor already has a finish, you'll need to remove it completely. Test a small, inconspicuous area by sanding—if the existing finish easily sands away, you can proceed. If it resists significantly, your floor likely has polyurethane or another synthetic coating requiring more aggressive preparation.
Inspect for moisture damage, excessive gaps between boards, or deep staining. Address these issues before finishing, as hardwax oil won't conceal significant problems, and moisture can compromise adhesion.
Essential Preparation Steps
- Sand the entire floor using 120-grit paper first, then 180-grit for final smoothing. This creates the surface profile necessary for proper oil absorption
- Remove all dust using a commercial vacuum with HEPA filtration, followed by a tack cloth application. Dust particles trapped in hardwax oil create rough patches and imperfections
- Check moisture levels with a moisture meter; wood should read 8-12% before treatment
- Allow 48 hours after sanding before application to ensure all residual dust settles
- Ensure proper ventilation throughout your workspace by opening doors and windows open
Gathering Your Materials and Tools
Successful hardwax oil application requires appropriate equipment. Invest in quality brushes specifically designed for hard wax oil—natural bristle brushes work excellently with these products. Avoid synthetic bristles, which can shed fibres into the finish. You'll also need a lint-free cloth or microfibre mop for buffing, a paint tray, and potentially a floor buffer for larger areas.
Safety equipment includes gloves, eye protection, and a dust mask. Ensure adequate ventilation with external extraction or open windows, as hardwax oil releases mild fumes during curing. Temperature and humidity control matter significantly; maintain 15-23°C and 40-60% relative humidity for optimal results. Colder conditions extend drying times considerably.
Application Technique: Professional Method
First Coat Application
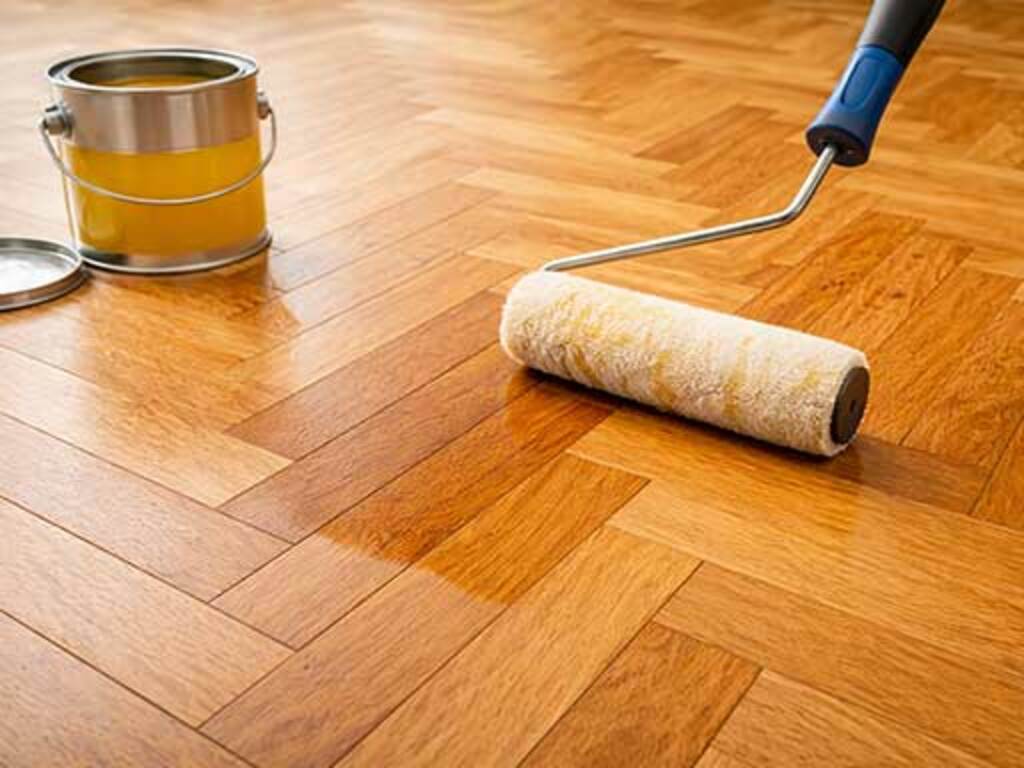
Begin by thoroughly stirring your hardwax oil—never shake vigorously, as this introduces air bubbles. Pour a manageable quantity into your paint tray. Using your brush, apply the oil in the direction of the wood grain with smooth, overlapping strokes. Work methodically across the floor in manageable sections, typically 1-2 square metres at a time.
The key to a successful application is using appropriate quantities. Apply thin, even coats rather than thick applications—excess oil creates sticky surfaces and takes significantly longer to cure. Your brush should carry enough product to cover the wood without dripping or pooling. Within 10-15 minutes of application, use a lint-free cloth to buff the surface, removing excess oil and creating an even finish.
Waiting Periods and Maintenance
Hardwax oil typically requires 4-6 hours between coats, though this varies by product and environmental conditions. Before applying subsequent coats, lightly sand with 220-grit paper using a handheld block or floor buffer. This de-glosses the surface and removes any minor dust particles. Vacuum thoroughly and tack down again with a cloth before application.
Most installations require 2-3 coats for optimal durability. The first coat penetrates deeply, providing foundational protection. Second and third coats build surface protection and enhance lustre. Allow 24-48 hours before light foot traffic and 7-14 days before replacing furniture, depending on product specifications and climatic conditions.
Essential Application Guidelines
- Maintain consistent temperature throughout application and curing—cold environments dramatically extend drying times and may compromise curing quality
- Avoid high humidity during application, as moisture prevents proper oil absorption and can cause blotchy finishes
- Work in sections rather than attempting entire rooms simultaneously, ensuring uniform application and preventing edge marks
- Never apply over damp wood or in direct sunlight, both of which interfere with absorption
- Test inconspicuous areas first, particularly if combining different hardwax oil brands or products
- Keep cloth damp when buffing to prevent premature drying and surface streaking
Troubleshooting Common Issues
Dealing with Blotchy or Uneven Finishes
Blotchy appearance typically results from inconsistent wood absorption or dust contamination. Softwood species and areas with varying grain density absorb oil unevenly. Sand affected areas lightly with 220-grit paper and reapply, ensuring thorough dust removal. Alternatively, subsequent coats often blend and even out previous applications as they cure.
Addressing Sticky or Wet Surfaces
Excessive oil application leaves surfaces tacky and extends curing dramatically. If this occurs before your buffing window closes, immediately use additional clean cloths to remove excess product. Never allow tackiness to dry; always buff while the surface remains workable. For subsequent coats, apply thinner applications and buff more aggressively.
Long-Term Maintenance and Care
One significant advantage of hardwax oil is straightforward maintenance. Sweep regularly with soft-bristled brushes and vacuum using low suction to prevent dust accumulation. Clean spillages promptly with barely damp microfibre cloths; hardwax oil's water resistance means spills won't damage the finish if addressed quickly.
Every 6-12 months, depending on traffic intensity, refresh your floor with maintenance oil—a thinner, faster-drying formulation designed specifically for already-finished floors. This top-up rejuvenates the protective layer, restores lustre, and extends the lifespan of your original finish. For worn areas, localised reapplication creates imperceptible repairs without refinishing entire rooms.
Final Considerations
Applying hardwax oil to wooden floors represents an achievable DIY project for determined homeowners. Success depends fundamentally on thorough preparation, appropriate environmental conditions, and consistent technique. Take time with sanding and dust removal—these steps determine finish quality more than application skill. When in doubt, apply thinner coats more frequently rather than attempting thick applications, and always allow adequate curing time between treatments. Your patience during the application yields years of beautiful, low-maintenance flooring.